top of page

Gas Strut Kit
Installation Instructions
Before you open the package and commence the installation process, please note the following cautionary advice;
- The package contains small parts and moving parts so it is best to keep the contents out of reach of children.
- Keep hands and fingers clear when opening and closing the brackets.
- Wear suitable personal protective equipment when installing the products.
- Always, always... it cannot be stressed enough... check for the presence of hidden or buried services within the fixing backgrounds before commencing the installation.
- Refer to tool and equipment makers recommended safety requirements for usage in conjunction with the assembly and installation of this product.
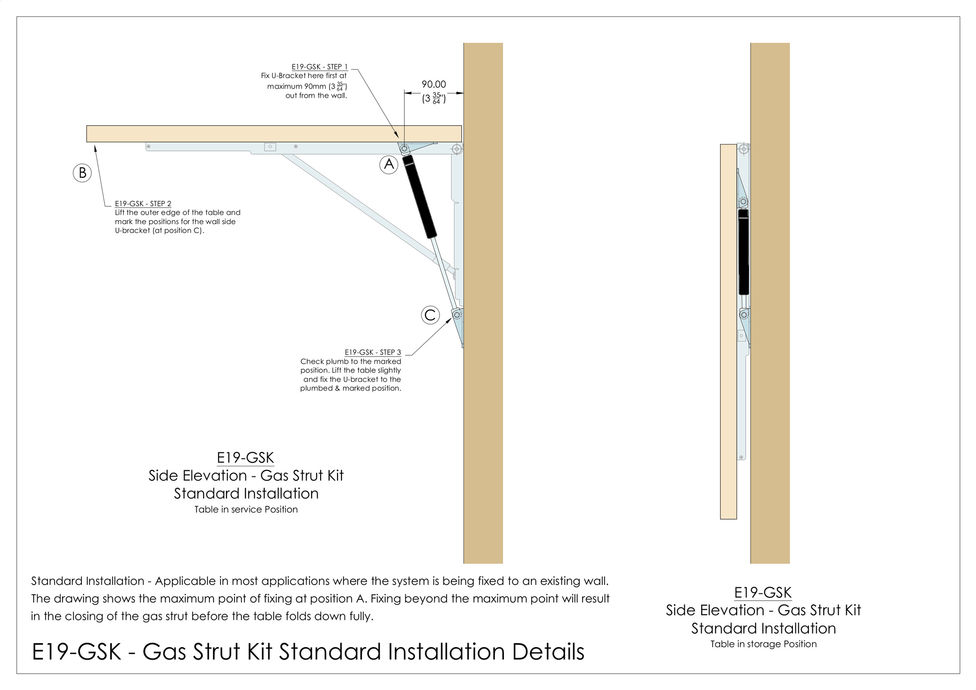
There are two methods to install the Gas Strut Kits. The "Standard Installation" is applicable in most applications where the system is being fixed to an existing wall. The drawings show the maximum point of fixing at position A. Fixing beyond the maximum point will result in the closing of the gas strut before the table folds down fully.
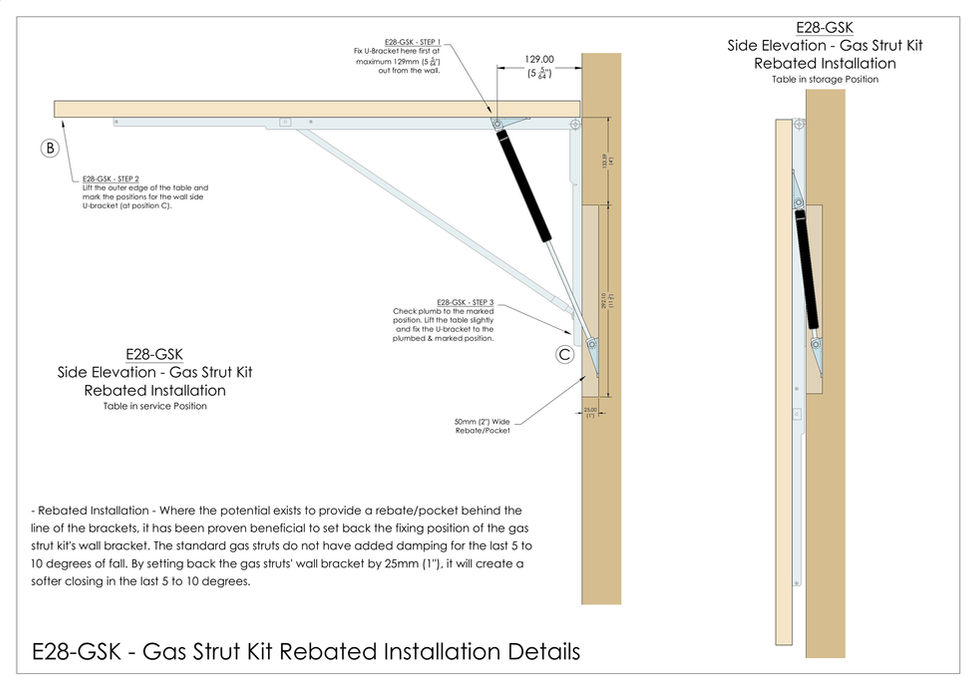
The second installation method is the "Rebated Installation" and is applicable where the potential exists to provide a rebate/pocket behind the line of the brackets, it has been proven beneficial to set back the fixing position of the gas strut kit's wall bracket. The standard gas struts do not have added damping for the last 5 to 10 degrees of fall. By setting back the gas struts' wall bracket by 25mm (1"), it will create a softer closing in the last 5 to 10 degrees.
The slider below should shows both the Standard & Rebated installation drawings, but, if you have any problems please let us know on info@eurekamfg.com and we will be delighted to help.
bottom of page


